
Want to build mobile apps with Bubble? You’ve landed in the right place. With Bravo Studio you can
build native mobile iOS and Android apps on top of your Bubble app. Let’s have a look at how to do it
If you have an existing Bubble web app and want to create and distribute a native app in the App Store and Google Play Store, you just need to follow a couple of simple steps to connect Bravo Studio to Bubble.io’s REST API.
You can also decide to use Bubble as your backend and Bravo Studio as your frontend. There’s a ton of possibilities out there in the no-code world.
The Bubble API enables users to access Bubble's platform programmatically in order to send requests to Bubble's servers, trigger app workflows, or read app data. Bear in mind that to access Bubble APIs you will need to have a paid plan for your Bubble App.
First, you will need to design your web app in Figma or Adobe XD. The advantage here is that you will be able to design your app with native components. Once you have your design ready with the corresponding Bravo Tags, you can import your design in Bravo Studio to turn into a native app. Thereafter, you will just need to bind the design elements with your Bubble backend data.
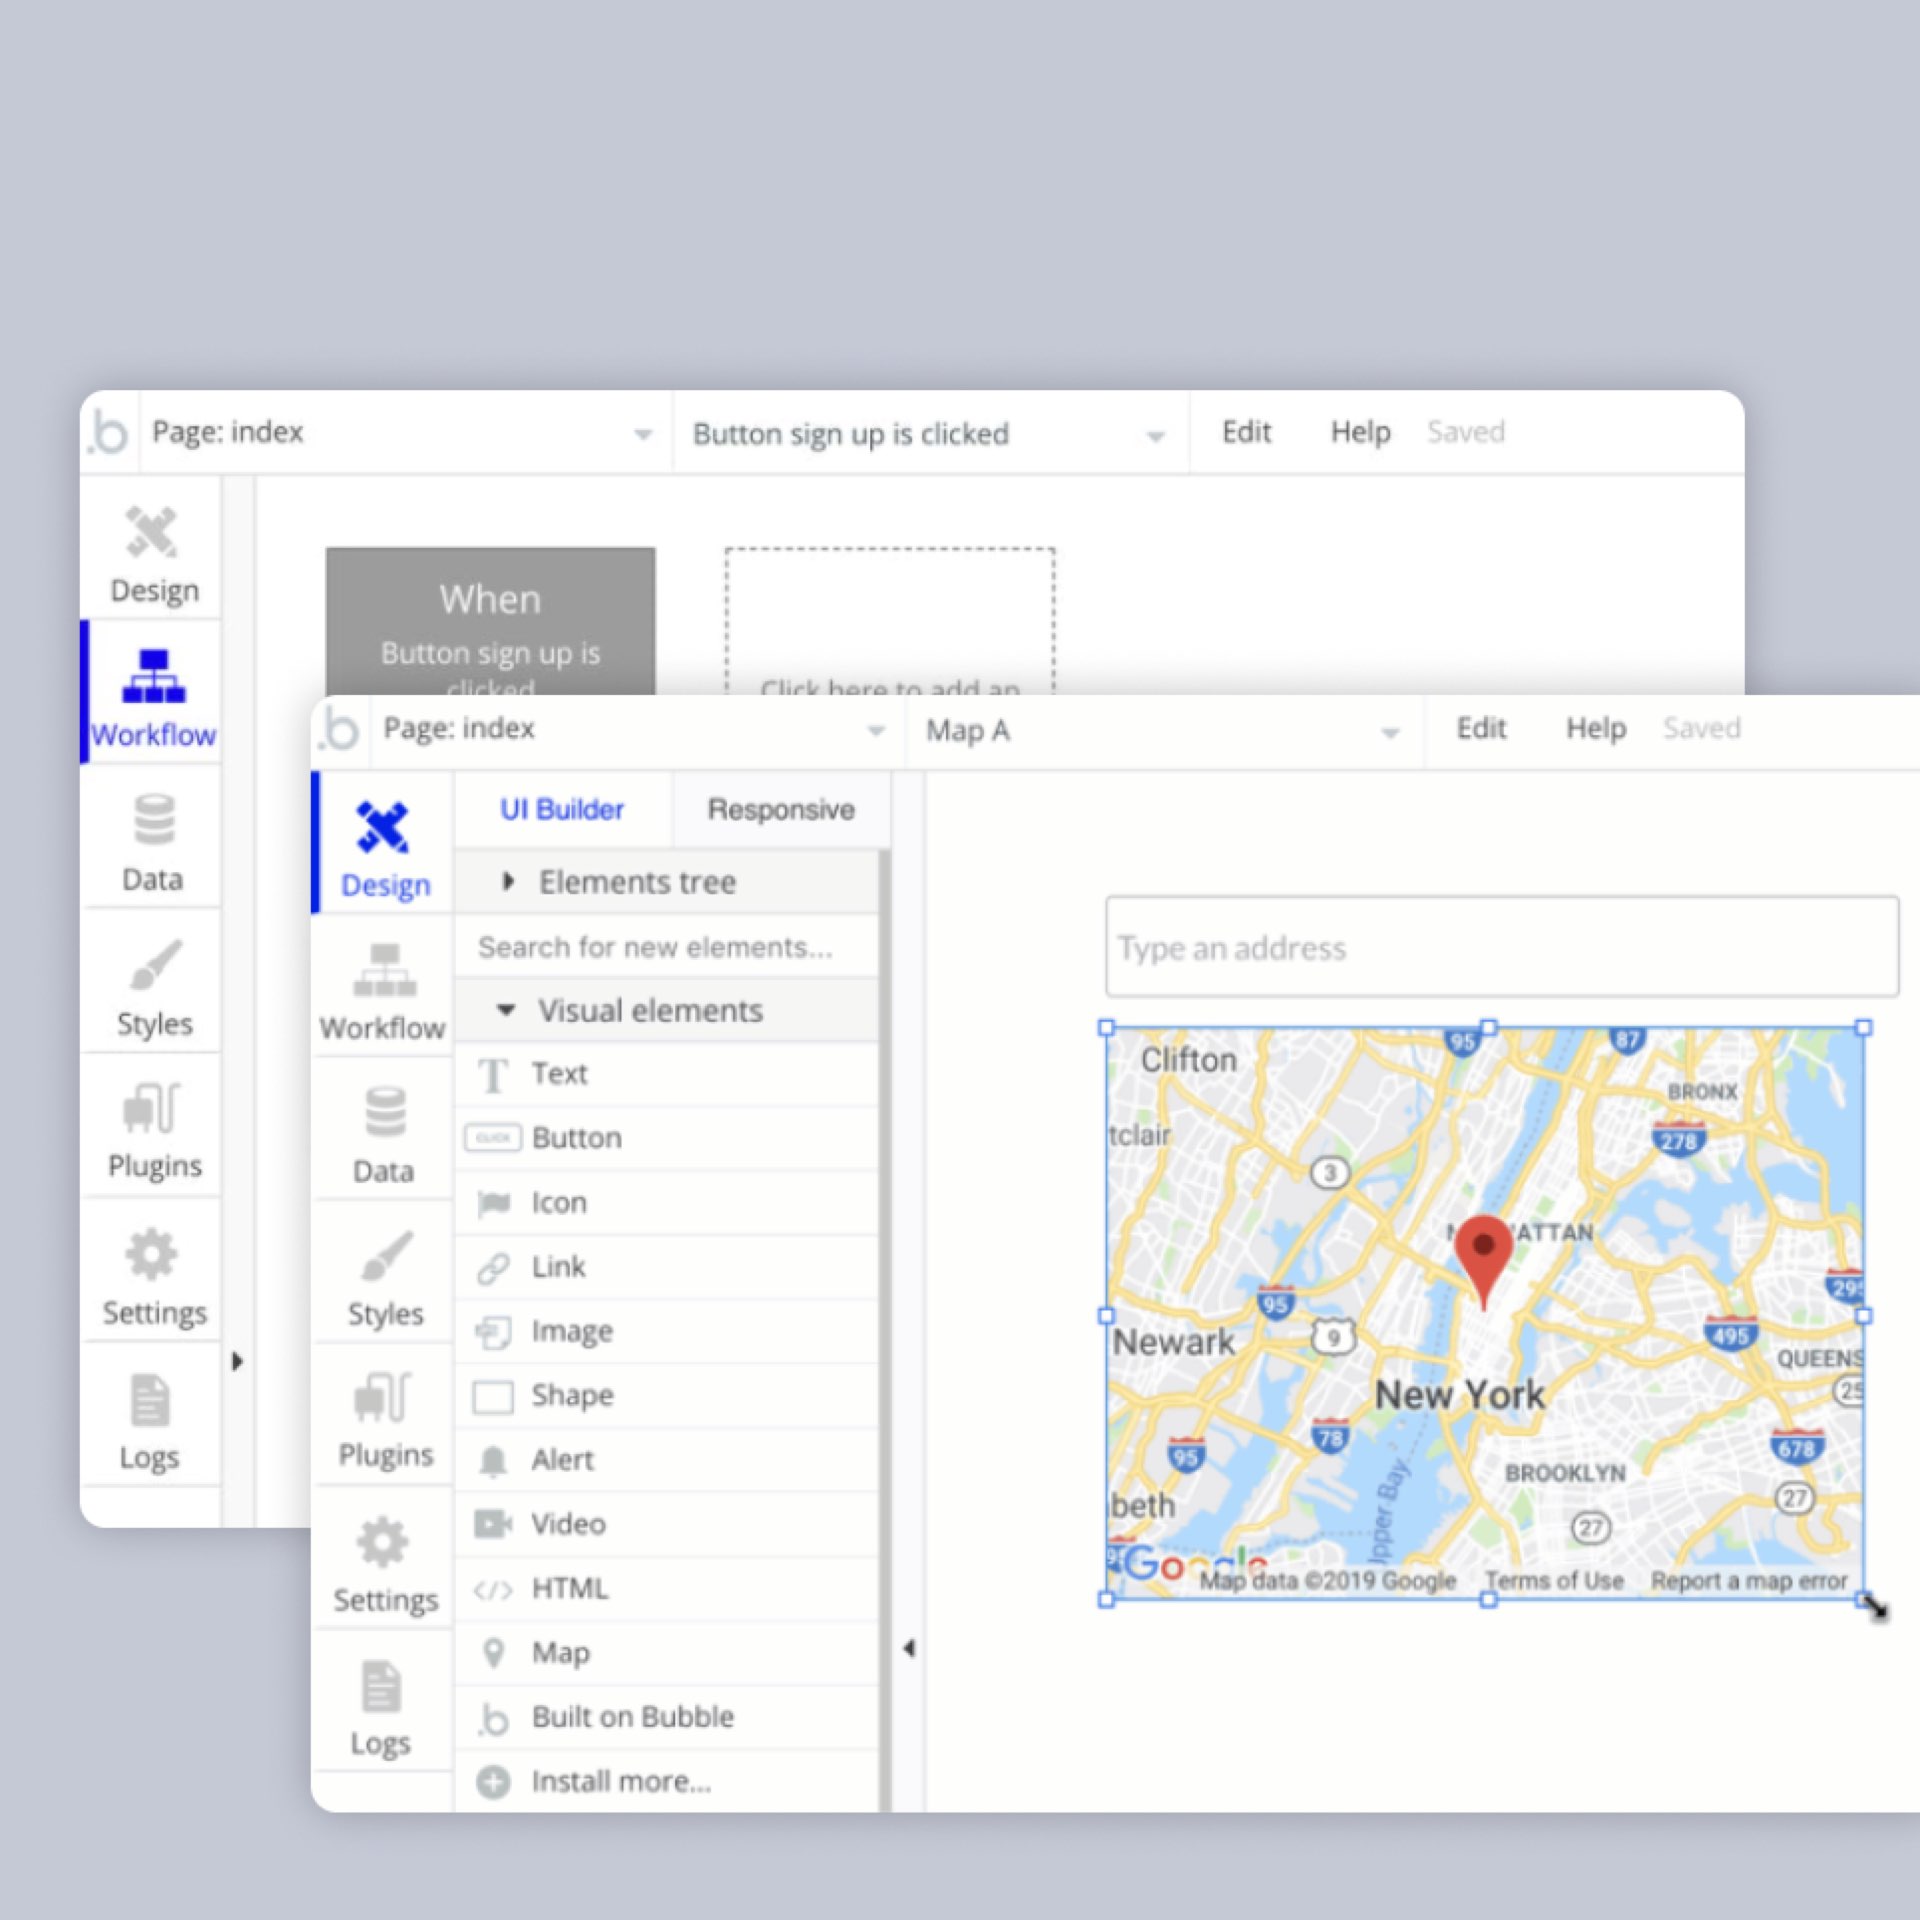
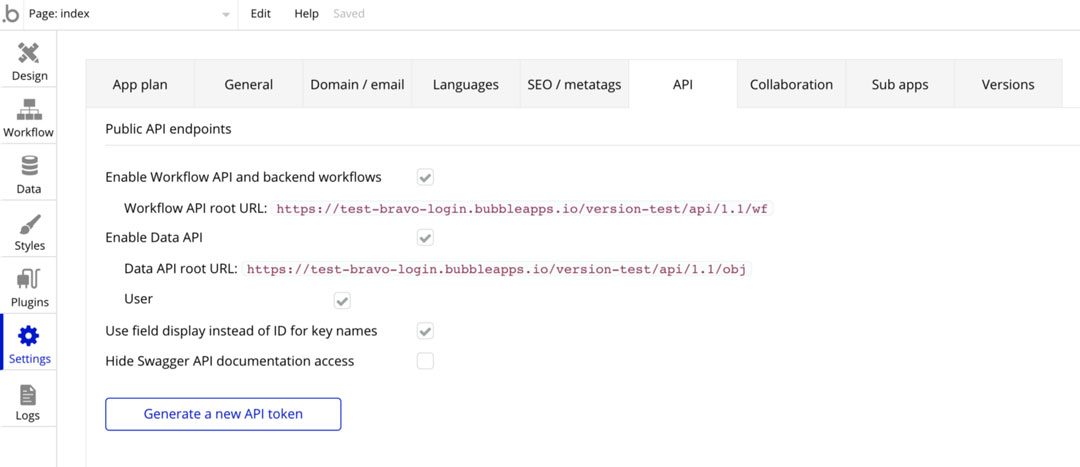
First, you’ll need to create a new Bubble App. Go to settings -> API and tick the boxes to enable the workflow API, data API, and user. Record the Workflow API root URL as you will need it later.
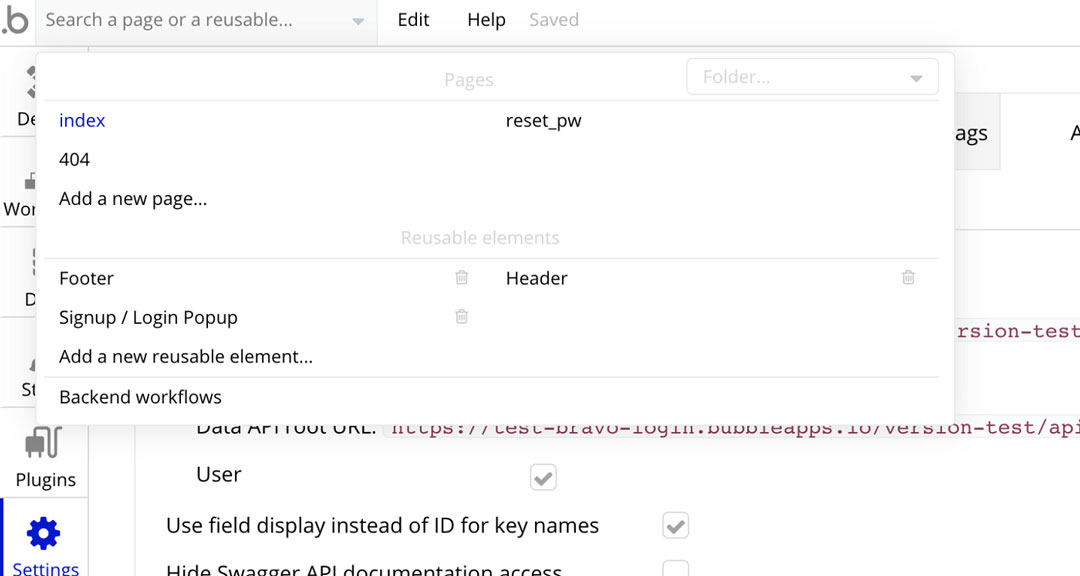
This will enable you to see the backend workflow editor in the top left dropdown.
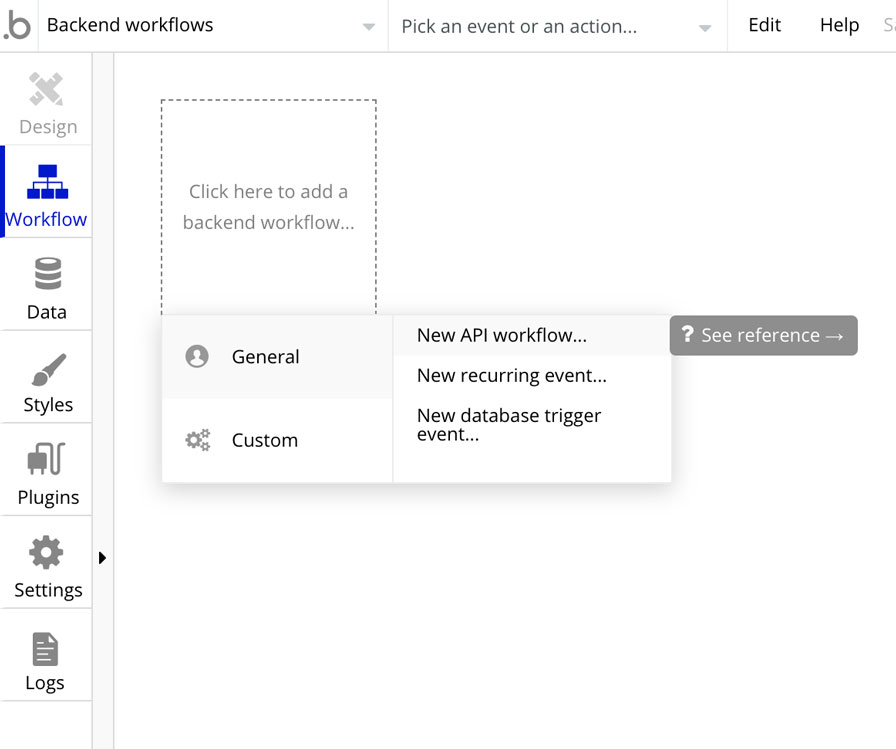
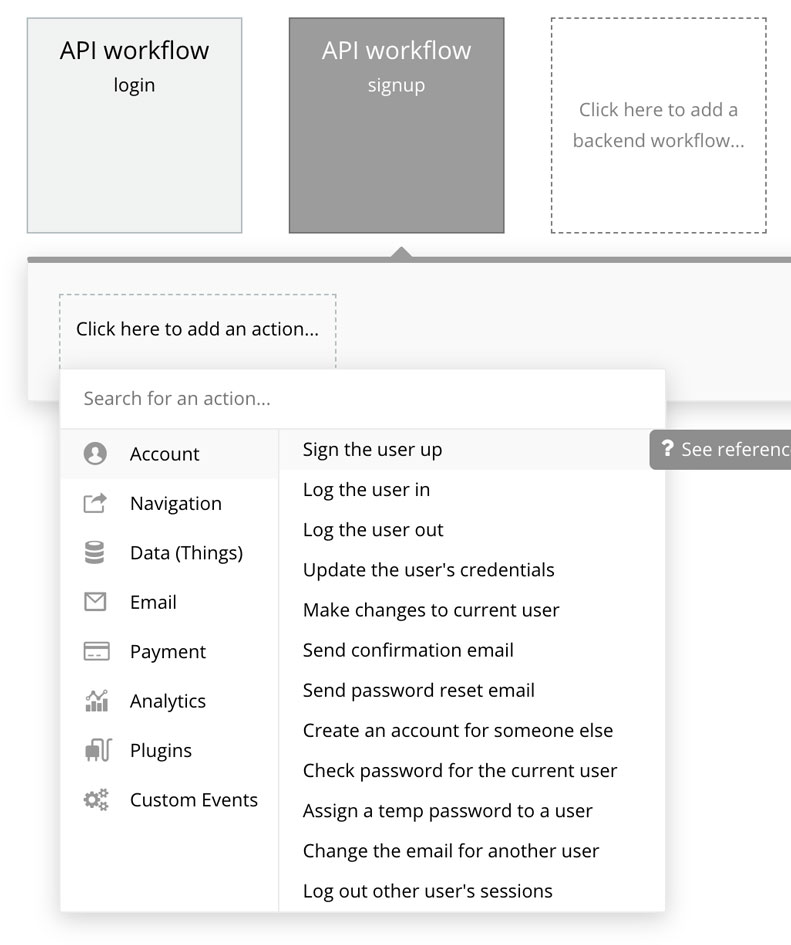
Then you should go into the backend workflow editor and add a new workflow (General -> New API workflow)
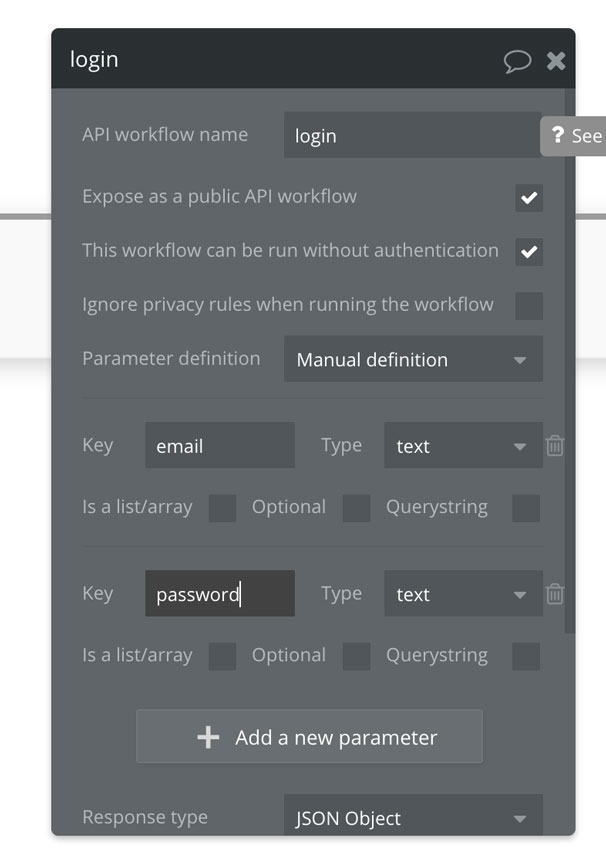
Call the new backend workflow login and enable it to run without authentication. Also add in two parameters email and password which will be the parameters used to do the authentication as below.
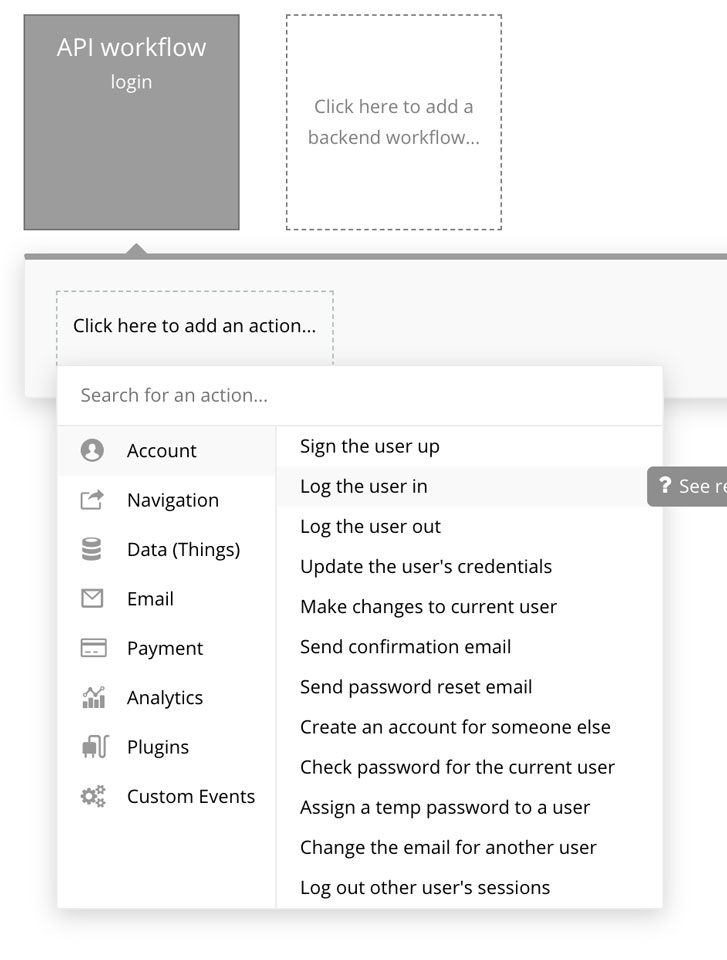
Then click to add an action and add an action to sign the user in (Account -> Log the user in).
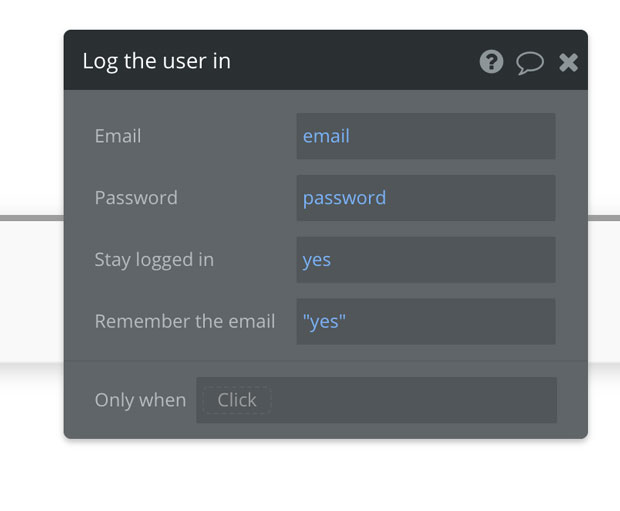
Complete the details for this step by connecting the email and password to the email and password field of the endpoint. Also choose “yes” to remember the email.
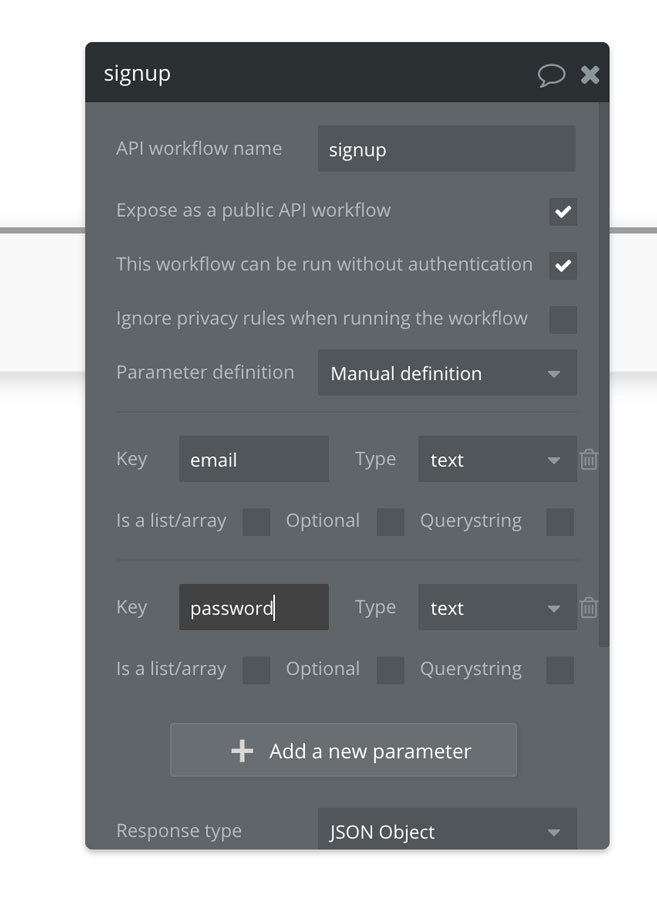
In the workflow editor add another workflow this time called signup, again allow it to be run without authentication and add email and password parameters.
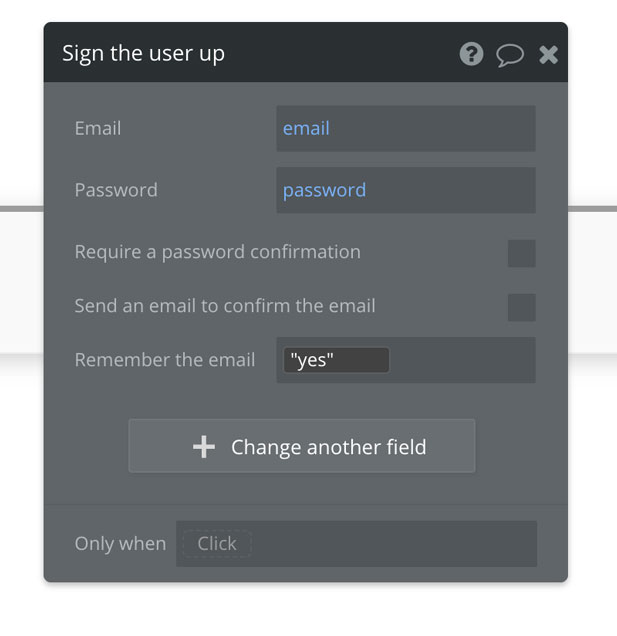
For this signup workflow add an action to sign the user up (Account -> sign the user up).
Complete the details for this step by connecting the email and password to the email and password field of the endpoint. Also choose “yes” to remember the email.
The login and signup APIs are now ready to be used for your Bubble app. The signup API is <Workflow API root URL>/signup and the login URL is <Workflow API root URL>/login (using the root URL from step A1).
First you need to login to Bravo. Then, you’ll need to import your Figma or Adobe XD file. Then click on Data Library in Bravo on the left hand side. Click on New Collection. Click on ‘Blank Request’ and name it. We’ve named it Foodgram as an example.
4. Click on the + button next to Requests to add a new request for each of the following 2 requests (NB the <Workflow API root URL> comes from step A1 above.
Signup
Name: Signup
Type: POST
Request URL: <Workflow API root URL>/signup
Headers : None
Parameters:
Key = email, Value = noone@none.com
Key = password, Value = noone
Body (JSON):
{
"email" : "${email}",
"password" : "${password}"
}
Once you have inputted the above hit the blue send button for this request to create the test user and to check everything is working okay.
Login
Name: Login
Type: POST
Request URL: <Workflow API root URL>/login
Headers : None
Parameters:
Key = email, Value = noone@none.com
Key = password, Value = noone
Body (JSON):
{
"email" : "${email}",
"password" : "${password}"
}
Once you have inputted the above hit the blue send button for this request to get sample data to allow the received data to be set up for this request.
Make sure the .data.response.token field is ticked and then in the Selected Data tab change the field’s name to token. We can reference this name as a variable in other requests to allow the request to pass authentication.
Now that we have the APIs in Bravo the last step is to connect them to the app design. Go into your app in Bravo so you can see all the screens.
First, click on the Signup screen to edit the binding for this screen, choose your app’s collection and then the signup request
In the Select Visual Elements list Click on the username element and connect it to email in the binding panel on the right hand side in the Content Destination section. This will bind the input field to this variable which will be used in the request.
Click on the password element and connect it to the password in the binding panel on the right hand side Change Response Actions — on success to Go to Page — Login.Change Response Actions — on failure to Show Alert with the text ‘Signup Failed’.
After doing this, click on the Login screen to edit the binding for this screen, choose your apps’ collection and then the login request
In the Select Visual Elements list Click on the username element and connect it to email in the binding panel on the right hand side in the Content Destination section. This will bind the input field to this variable which will be used in the request.
Click on the password element and connect it to the password in the binding panel on the right hand side. Change Response Actions — on success to Go to Page — Home Screen. Change Response Actions — on failure to Show Alert with the text ‘Login Failed’.
You have now connected your Bravo App to Bubble for Authentication!
If you need to make later requests that need Authentication, you can just add a Header with Key: Authorization and Value: Bearer ${token}. As Bravo remembers the token at login (we named .data.response.token as token in step B), we can pass it to later requests.
There are a lot of Bubble apps out there, but as it's web based there are times in which you need to offer your users an enhanced mobile experience. This is when Bravo Studio comes in really handy and helps you create native mobile apps in just a few steps! Start Bravorizing today for free!

